Select, Arrange, and Manage Elements in BoardCraft
Once a board contains several letters, images, shapes, and decorations, organization matters. This guide shows how to select the right items, position them precisely, control their layer order, group them, and keep the canvas manageable.
In this guide
Selection 1
Select one element
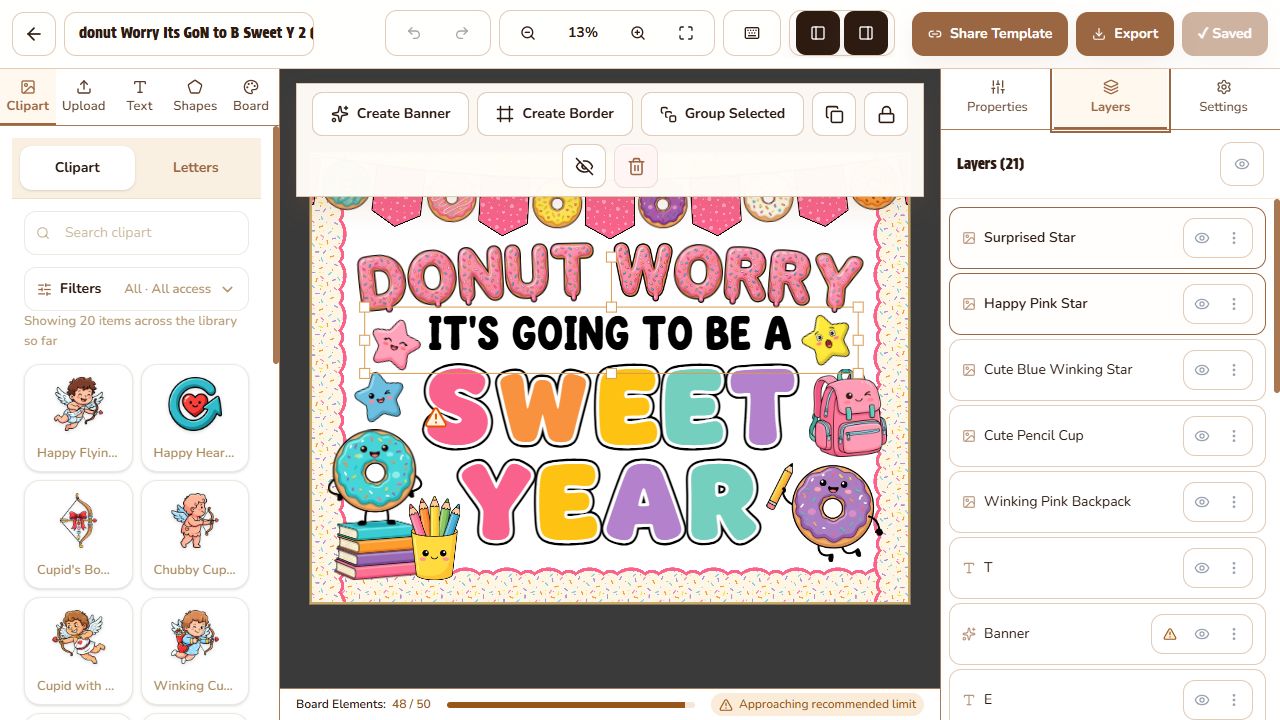
Click an element on the board to select it. A bounding box and handles appear around the active item, and the context toolbar appears above the canvas.
The context toolbar changes with the selected element. It may include fill choices, an element-specific edit button, Duplicate, Lock, Hide, and Delete. Text, Word Builder groups, name tags, banners, borders, and regular groups each expose the actions that apply to them.
Click an empty area of the workspace to clear the selection. If an overlapping element is difficult to click, use the Layers panel instead.
Selection 2
Select multiple elements
Layers gives you the most predictable multi-selection controls:
Click a layer to select only that element.
Hold Ctrl on Windows/PC or Cmd on macOS and click another layer to add or remove it from the selection.
Hold Shift and click another layer to select a range.
Use Ctrl/Cmd + A while the canvas is focused to select all compatible board content.
BoardCraft keeps multi-selection within compatible element categories. If selecting a new item replaces the current selection, those items may not support the same combined action.
With several compatible items selected, you can move them together and use shared actions such as Group Selected, Duplicate selected, Lock selected, Hide selected, or Delete selected. Some combinations can also become a banner or repeating border.
Arrange 1
Move, resize, and rotate
Drag a selected element to move it freely. Use the bounding-box handles to resize it and the rotation handle to turn it.
Precise movement
Use the arrow keys to nudge selected items. Hold Shift with an arrow key for a larger movement.
Straight movement
Hold Shift while dragging to keep movement on a straight horizontal or vertical line.
Snapped rotation
Hold Shift while rotating to snap the angle in 10-degree steps.
Exact measurements
Use Properties to enter Width, Height, X, Y, and Rotate values directly.
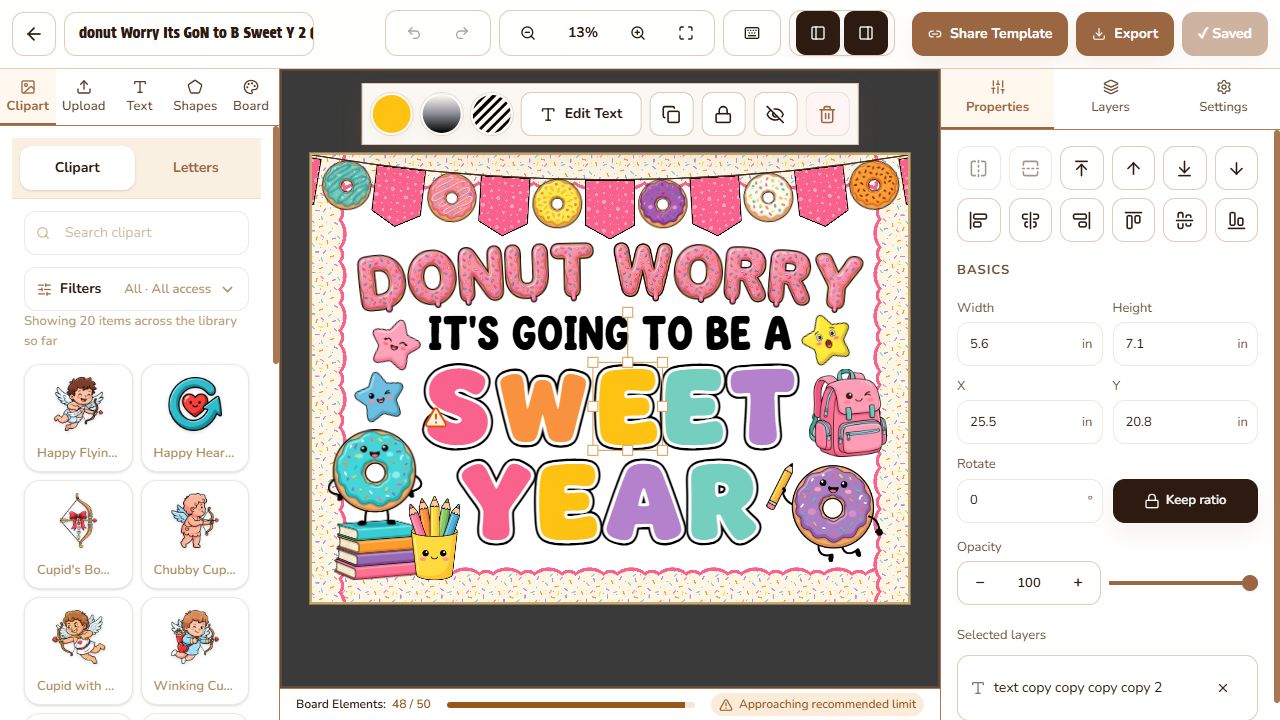
Keep Keep ratio enabled when you want width and height to scale proportionally. Turn it off only when intentionally stretching the element.
Arrange 2
Align elements and control layer order
The layout tools at the top of Properties cover two different jobs:
Board alignment: snap the selection to the board’s left edge, horizontal center, right edge, top edge, vertical middle, or bottom edge.
Layer order: bring an element to the front, move it forward one level, send it to the back, or move it backward one level.
Layer order determines which object appears on top when elements overlap. A useful structure is:
Board background and decorative border at the back.
Large panels, banners, and supporting shapes in the middle.
Titles, student names, and important clipart near the front.
Organize 1
Group and ungroup elements
Grouping turns several compatible elements into one movable unit. It is useful for a title made from separate letters, a clipart cluster, or a label built from text and shapes.
Select at least two compatible, unlocked elements.
Select Group Selected in the context toolbar, or press Ctrl/Cmd + G.
Move, resize, rotate, duplicate, or lock the new group as one item.
Select a regular group to access Edit Group and Ungroup. Edit Group lets you work with the group’s appearance; Ungroup restores its children as separate board elements.
Generated elements use related language:
Edit Letters Group reopens a Word Builder creation.
Edit Tiles edits the repeated pieces in a banner or border.
Convert Back returns a banner, border, or name tag to its underlying elements.
Organize 2
Manage busy designs with Layers
Layers lists the board’s elements by name. Use it when the canvas becomes crowded or when a large object covers a smaller one.
Click a layer name to select its element.
Double-click the name to rename the layer.
Drag an unlocked layer within the list to change its stacking position.
Select the eye icon to hide or show an element.
Use the top eye control to change visibility for all layers.
Open the three-dot menu for Lock or Unlock, Duplicate, and Delete.
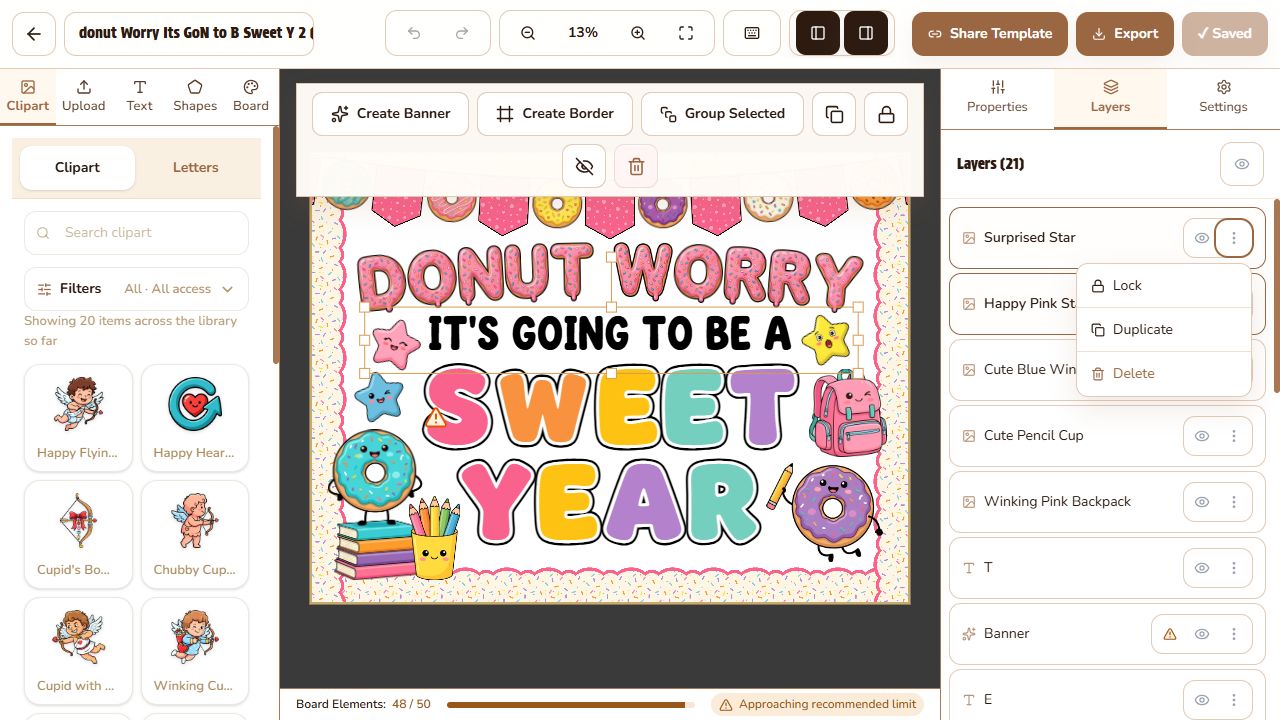
Warning icons beside a layer indicate that the item may exceed the selected paper size and need tiled printing. This does not necessarily mean the element is positioned incorrectly.
Organize 3
Duplicate, lock, hide, and delete
Duplicate
Create a separate copy that you can move or edit. Use it for repeated labels, matching decoration, and consistent shapes.
Lock
Protect a finished item from accidental canvas movement and most selection-toolbar edits. Unlock it when you need to change its properties or position.
Hide
Keep an element in the project while removing it from the visible canvas and exports. Show it again from Layers.
Delete
Remove an element from the board. Use Undo immediately if it was deleted by mistake.
Copy, Cut, and Paste are also available through standard shortcuts. Pasted or duplicated elements become independent copies; changing one does not update the others.
Work Faster
Essential element shortcuts
Action | Windows / PC | macOS |
|---|---|---|
Select all | Ctrl + A | Cmd + A |
Duplicate | Ctrl + D | Cmd + D |
Copy / Cut / Paste | Ctrl + C / X / V |
Keyboard commands work while the board workspace is focused. Click the canvas first if a shortcut is not responding, and avoid single-letter shortcuts while typing in a text field.